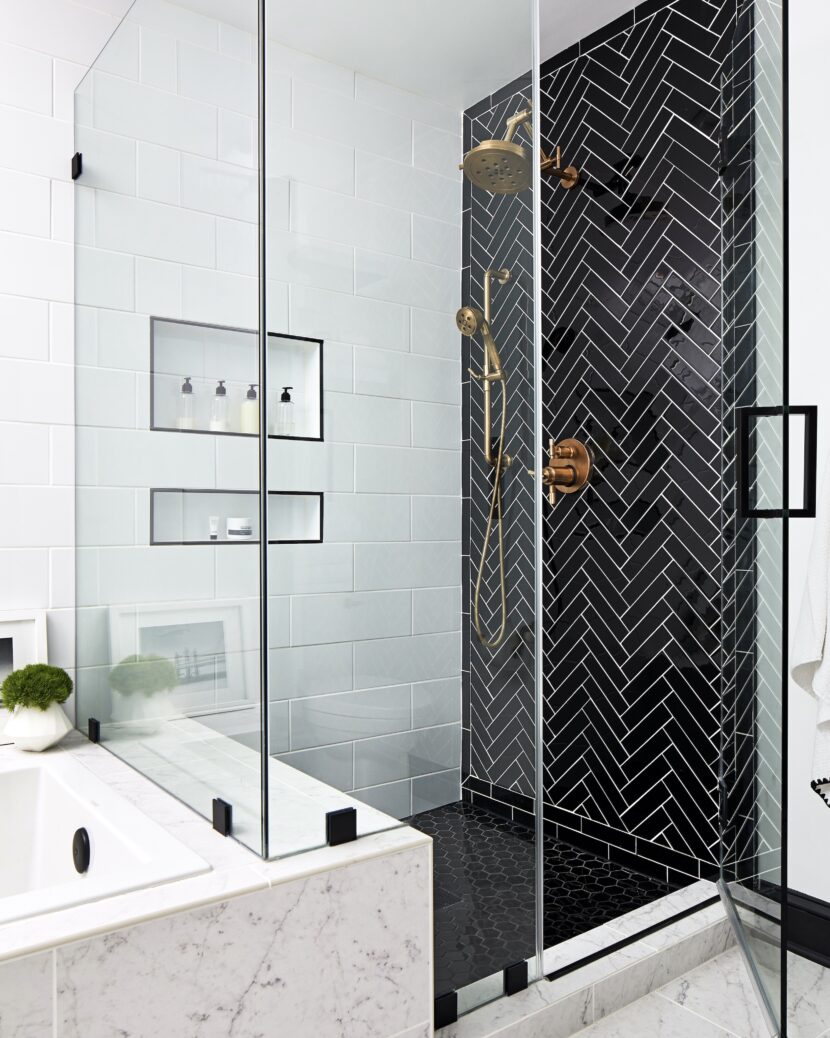
I’ve been getting a lot of questions about grout lately. I know, what an odd thing to say… but when you’re designing eleven (yes… I said eleven!) bathrooms at one time grout becomes kind of a big deal! I’ve also had a few followers reach out, looking for my design advice on selecting grout for their own kitchens and bathrooms. So I decided to answer everyone’s questions in this post.
First, It’s Ultimately A Design Decision:
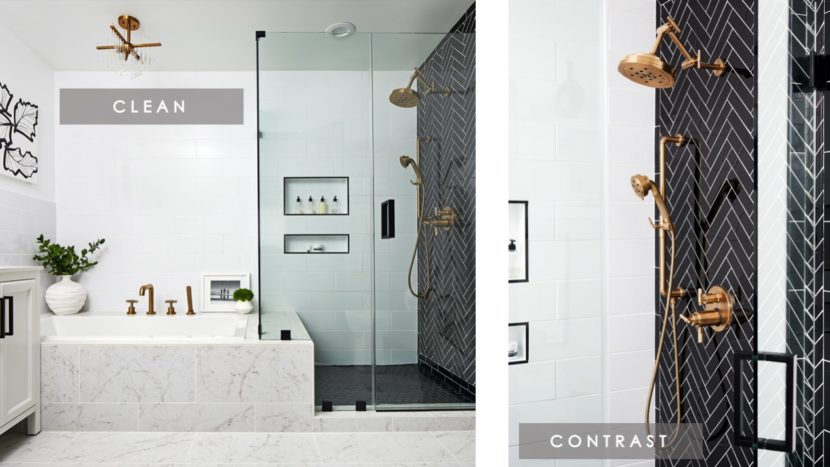
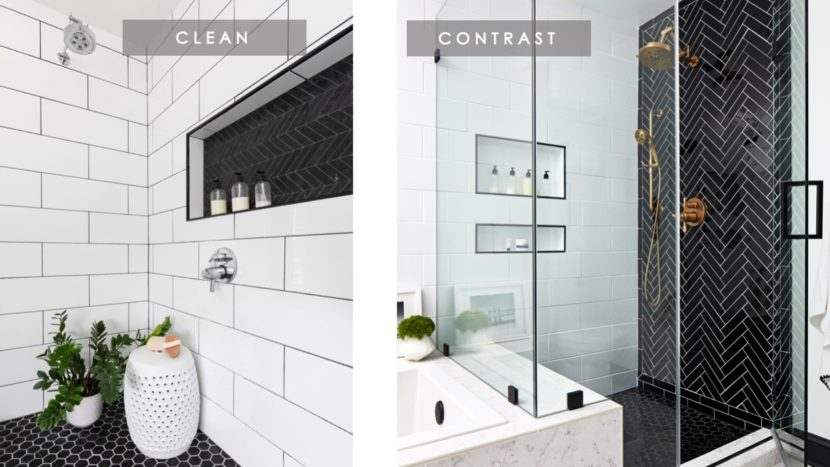
Like everything in interior design the details are what make the space… and grout is no different. The best advice that I can give you, is to decide what “look” you’re going for first. Are you looking for high-contrast design, for blending-in, or for a mix of both? This will ultimately drive the decision making process, and will get you the best look possible. For example, you can use the same bold black tile in two different ways, and get two totally different looks. These two bathrooms that I designed for instance, look completely different based on the grout color that I selected.
In my master bathroom, I went for a high contrast white grout to make the black herringbone tile in the shower really pop! For my clients master bath, we went for a dark grey grout to let the black herringbone tile on the shampoo shelf dissolve into the background. Both spaces look great, but achieve completely different stylistic goals.
Time To Compare:
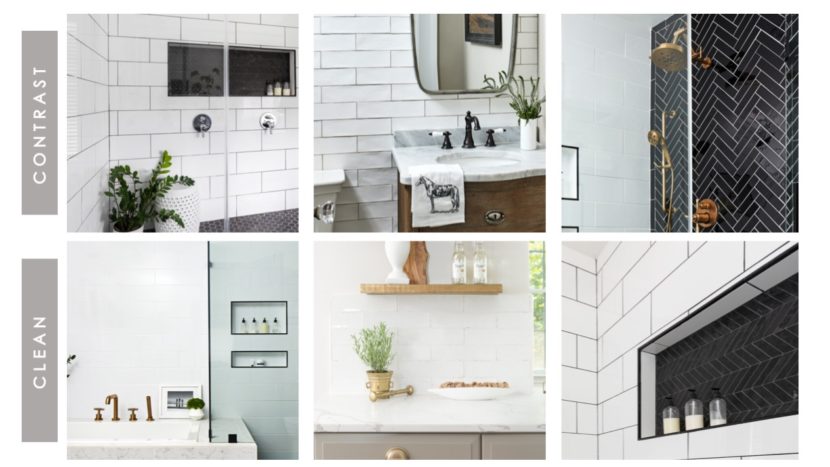
Some people are visual learners, so in comparing different tile & grout color combinations I created a little chart to help you better understand the differences between contrast and clean tile design styles. The top line of bathrooms all feature grout colors that contrast the tile selections, while the bottom all use similar grout color palettes to create a clean look with less emphasis on the tiles. What are you most naturally drawn towards?
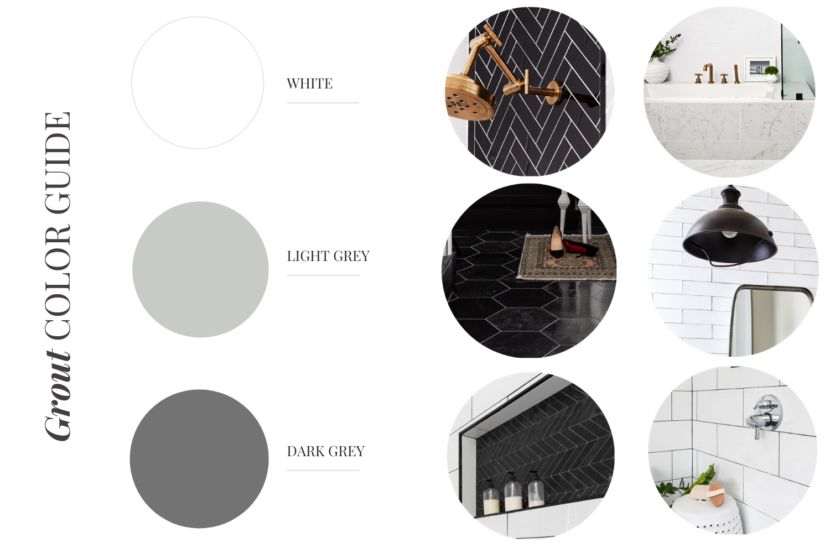
Still unsure about which grout color you should pick? Here’s a chart of the 3 most versatile grout colors (white, light grey, and dark grey) for pairing with both black and white tiles, to help you decide.
The Magic Is In The Mix:
The heading here says it all; the magic is in fact in the mix! I love using a mix of grout colors, tile shapes, and tile materials in one space, to create the most interesting designs. My master bath is, yet again, a great example of this.
From the flooring, to the shower walls, to the shower floors… I used subway, marble, herringbone, and penny tiles! That’s a mouthful of tile types…but it all works together! How does it work, you may ask? Well, it works because I chose a handful of tiles/design elements that I wanted to “stand out”, and then I let the rest blend right in.
The back wall and bathroom floor in my master bath, are both made of light colored tiles with white grout. This creates the perfect blank canvas to highlight my bold herringbone feature wall & brass Brizo fixtures! Since this bold wall and gorgeous fixture are the jewels of the space, I wanted to play-them-up and really highlight them. That’s why I selected a high-contrast white grout for this design element. Had I done contrast grout on every surface in the space, it would have been overwhelming and distracting to the eye. Instead, I highlighted what was most important and let the rest of the mix do its magic!
My Best Overall Grout Tips:
Here’s a few other general tips-and-tricks that I follow when selecting grout for my design projects.
- If I’m doing white grout in a bathroom (or another potentially wet space), I pay the extra money to have a TEC “booster” added to the grout. This is mixed in with the grout, and makes the grout stain and mildew resistant, and helps it to not yellow overtime (making it perfect for a shower, bathroom floor, or mudroom).
- When selecting tile spacing, I typically use 1/8” spacing when laying tile. This is my go-to, everyday spacing for when I’m trying to create a natural or blended-in look. If you’re going for a bold or high-contrast look, thicker grout spacing may be ideal.
With these tips-and-tricks in-mind, hopefully you’re ready to tackle your next big tile project!

